科特林安卓运动布局
原文:https://www . geesforgeks . org/Android-motion-layout-in-kot Lin/
运动布局是约束布局T4 的特殊版本。这是一个布局,有助于管理应用程序中的运动和小部件动画。由于它是 ConstraintLayout 的特殊版本,所以它是作为 ConstraintLayout 的子类制作的。它通过描述如何在不同布局之间过渡,为 app 提供触控动作。简而言之,它非常强大,可以用来在应用程序中创建大量动画和触摸控制的动作。

为什么是 MotionLayout?
- MotionLayout,顾名思义就是,首先是一个布局,让你定位你的元素。它实际上是 约束布局 的子类,并建立在其丰富的布局能力之上。
- 创建运动布局是为了弥合布局过渡和复杂运动处理之间的差距。
- 超出这个范围,另一个关键的区别是 MotionLayout 是完全声明性的,它可以用 XML 完全描述,没有预期的代码。
方法:
以下是在 Kotlin 中创建运动布局的各个步骤。
第一步:启动一个新的 Android Studio 项目 请参考 这篇文章来详细看看关于如何创建一个新的 Android Studio 项目。
第二步:将运动布局类添加到项目中
这是一个必要的步骤,因为没有这个,我们的应用程序将停止运行。由于 MotionLayout 是 ConstraintLayout 的一个子类,它是 Android 家族中一个相当新的成员,很有可能我们的项目中默认没有它。要将其添加到我们的项目中,我们需要将以下依赖项添加到我们的 build.gradle: app:
实现“androidx . constraint layout:constraint layout:2 . 0 . 0-beta 7”
我们需要按照我们所做的改变进行梯度同步。一旦成功,我们可以继续构建应用的其余部分。
第三步:将 MotionLayout 作为根布局
在这一步中,我们将设计activity _ main . XML文件。我们将使用 MotionLayout 作为我们的根 XML 元素,并定义其属性,如高度和宽度。需要注意的是,运动布局可以包含其他布局,如嵌套在其中的约束布局、相对布局、框架布局。它还包含我们在用户界面中想要的所有视图,如文本视图和按钮。让我们看看我们应用的activity _ main . XML的代码。
可扩展标记语言
**<?xml version="1.0" encoding="utf-8"?>
<androidx.constraintlayout.motion.widget.MotionLayout
    xmlns:android="http://schemas.android.com/apk/res/android"
    xmlns:app="http://schemas.android.com/apk/res-auto"
    xmlns:tools="http://schemas.android.com/tools"
    android:id="@+id/motionLayout"
    android:layout_width="match_parent"
    android:layout_height="match_parent"
    app:layoutDescription="@xml/new_xml"
    tools:context=".MainActivity">

    <FrameLayout
        android:id="@+id/textViewContainer"
        android:layout_width="match_parent"
        android:layout_height="match_parent" />

    <androidx.constraintlayout.widget.ConstraintLayout
        android:id="@+id/swipeLayout"
        android:layout_width="match_parent"
        android:layout_height="0dp"
        android:background="#185416"/>

    <TextView
        android:id="@+id/tvHelloWorld"
        android:layout_width="wrap_content"
        android:layout_height="wrap_content"
        android:text="Geeks for Geeks!"
        android:textSize="50sp"
        app:layout_constraintTop_toTopOf="@id/textViewContainer"
        app:layout_constraintBottom_toBottomOf="@id/textViewContainer"
        app:layout_constraintStart_toStartOf="@id/textViewContainer"
        app:layout_constraintEnd_toEndOf="@id/textViewContainer"/>

</androidx.constraintlayout.motion.widget.MotionLayout>**
请注意,在上面的代码中,我们有一个名为app:layoutDescription*的属性,其值为 *@xml/new_xml 。这其实就是包含我们的动画是怎样的,应该做什么的描述的文件。我们尚未制作此文件,但将在下一步制作。该代码还有一个约束布局,它是动画的一部分。动画发生时,它将基本覆盖屏幕。接下来,我们有一个单一的文本视图,它将显示在我们的屏幕上。****
**第四步:制作新的 xml 文件****
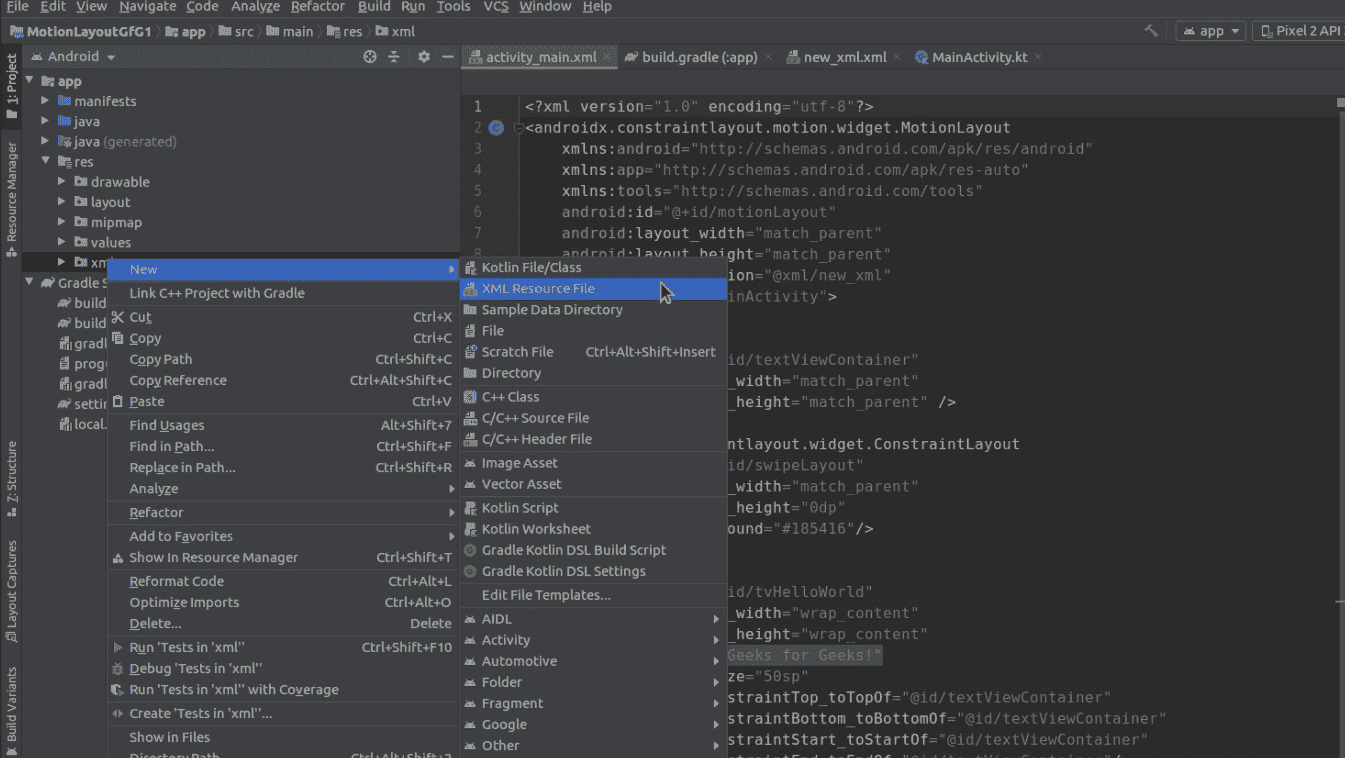
*正如我们所说的,我们现在将创建 *new_xml.xml 文件,该文件在我们之前的代码中被设置为应用程序:layoutDescription 的值。为此,我们首先需要创建一个新的 XML 资源文件。首先,我们将在资源文件夹中创建一个目录,并将其命名为 xml 。为此,点击 app - > res (右键)- > 新建- > 目录****
* *
*
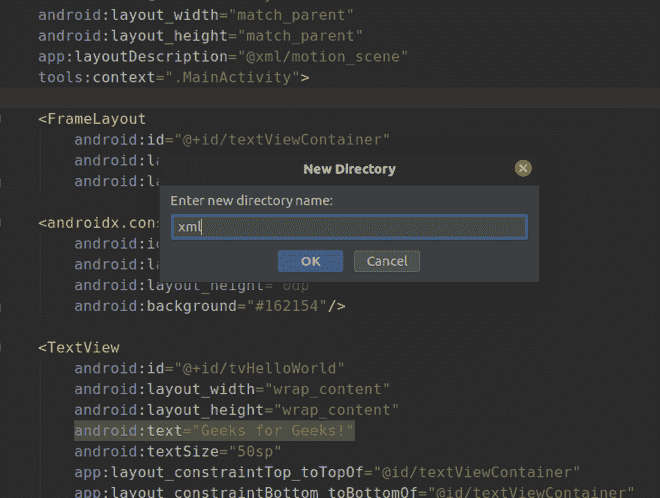
*现在我们有了一个 *xml 目录,我们将在其中创建一个名为 new_xml 的文件。为此,单击 xml(右键)- >新建- > XML 资源文件,并将文件命名为 new_xml 。****
* *
*
**第五步:向 new_xml.xml 添加代码****
*现在我们已经准备好了一切,我们可以定义我们的动画应该如何在 new_xml.xml 中。我们首先打开一个 *MotionScene XML 标签。在本例中,我们将只使用“过渡”属性制作一个基本的过渡动画,并通过设置【on sweep】元素来定义它应该何时发生,即向上拖动、向下拖动 、 向左拖动 、等。我们的代码是这样的:****
*可扩展标记语言*
****<?xml version="1.0" encoding="utf-8"?>
<MotionScene
    xmlns:android="http://schemas.android.com/apk/res/android"
    xmlns:app="http://schemas.android.com/apk/res-auto"
    xmlns:motion="http://schemas.android.com/tools">

    <Transition
        app:constraintSetStart="@+id/start"
        app:constraintSetEnd="@+id/end"
        app:duration="100"
        app:motionInterpolator="linear">

        <OnSwipe
            app:dragDirection="dragUp"/>

    </Transition>

    <ConstraintSet android:id="@id/start">
        <Constraint
            android:id="@id/tvHelloWorld">
            <CustomAttribute
                app:attributeName="textColor"
                app:customColorValue="#175416" />
        </Constraint>

        <Constraint
            android:id="@id/swipeLayout"
            app:layout_constraintTop_toBottomOf="parent"
            app:layout_constraintBottom_toBottomOf="parent"
            app:layout_constraintStart_toStartOf="parent"
            app:layout_constraintEnd_toEndOf="parent" />
    </ConstraintSet>

    <ConstraintSet android:id="@id/end">
        <Constraint
            android:id="@id/tvHelloWorld">
            <CustomAttribute
                app:attributeName="textColor"
                app:customColorValue="@android:color/white" />
        </Constraint>

        <Constraint
            android:id="@id/swipeLayout"
            app:layout_constraintTop_toTopOf="parent"
            app:layout_constraintBottom_toBottomOf="parent"
            app:layout_constraintStart_toStartOf="parent"
            app:layout_constraintEnd_toEndOf="parent" />
    </ConstraintSet>

</MotionScene>****
*要知道我们还可以应用哪些动画,请查看此链接:https://developer . Android . com/training/constraint-layout/motion layout # additional _ motion layout _ attributes。*
**第六步:MainActivity.kt 文件****
*现在,我们拥有了让我们的应用程序正常工作所需的一切。需要注意的一点是,到目前为止,我们还没有对 *MainActivity.kt 文件进行任何更改。这是因为我们只是在设计 UI,而不是应用的逻辑。万一有人想让他们的应用做点什么,上面的文件中肯定会有一些代码,但是对于这个例子,这就是我们的mainactivity . ktT5 的样子:****
*我的锅*
****package com.example.motionlayoutgfg1

import androidx.appcompat.app.AppCompatActivity
import android.os.Bundle

    class MainActivity : AppCompatActivity() {

    override fun onCreate(savedInstanceState: Bundle?)
    {
        super.onCreate(savedInstanceState)
            setContentView(R.layout.activity_main)
    }
}****
*作为模拟器运行*
*因为在我们的 *new_xml.xml 文件中,我们定义了我们的动画过渡将在我们向上滑动(dragUp)时发生,这就是我们这样做时的输出。****
**
