安卓中的底部导航栏
原文:https://www . geesforgeks . org/bottom-navigation-bar-in-Android/
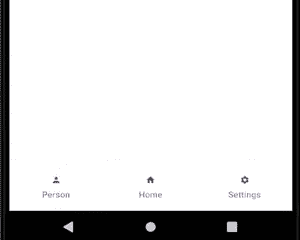
我们都遇到过有底部导航栏的应用程序。一些流行的例子包括 Instagram、WhatsApp 等。在本文中,让我们学习如何在安卓应用中实现这样一个功能性的底部导航栏。下面是底部导航栏示例的预览:
为什么我们需要一个 底部导航栏?
- 它允许用户轻松切换到不同的活动/片段。
- 它让用户了解应用程序中可用的不同屏幕。
- 用户能够检查他们现在在哪个屏幕上。
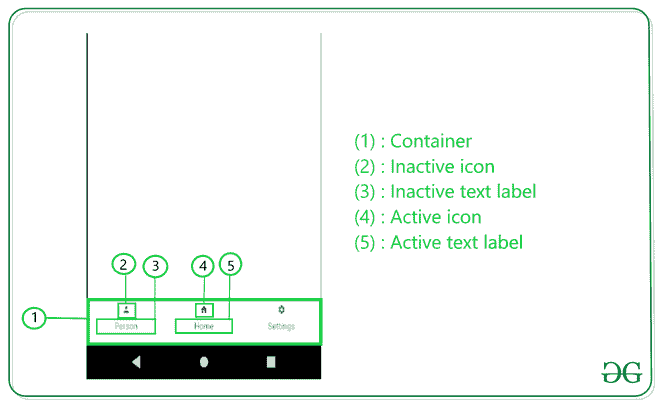
下面是底部导航栏的解剖图:
创建底部导航栏的步骤
第一步:新建安卓工作室项目
在安卓工作室创建新项目请参考 【如何在安卓工作室创建/启动新项目】 。
第 2 步:将依赖项添加到 build.gradle(:app)文件中
我们将使用安卓的材料设计库,因此我们需要将其导入build . gradle(:app)文件。下面是我们需要添加的依赖项:
实现' com . Google . Android . material:material:1 . 2 . 0 '
*第三步:使用 activity_main.xml 文件*
例如,创建一个带有 框架布局 和底部导航栏的基本应用程序。框架布局将包含 片段 ,该片段将随着用户点击底部导航栏中的项目而改变。这就是 activity_main.xml 的样子:
可扩展标记语言
<?xml version="1.0" encoding="utf-8"?>
<androidx.constraintlayout.widget.ConstraintLayout
    xmlns:android="http://schemas.android.com/apk/res/android"
    xmlns:app="http://schemas.android.com/apk/res-auto"
    xmlns:tools="http://schemas.android.com/tools"
    android:layout_width="match_parent"
    android:layout_height="match_parent"
    tools:context=".MainActivity">

    <FrameLayout
        android:id="@+id/flFragment"
        android:layout_width="match_parent"
        android:layout_height="0dp"
        app:layout_constraintBottom_toTopOf="@+id/bottomNavigationView"
        app:layout_constraintEnd_toEndOf="parent"
        app:layout_constraintHorizontal_bias="0.5"
        app:layout_constraintStart_toStartOf="parent"
        app:layout_constraintTop_toTopOf="parent" />

    <com.google.android.material.bottomnavigation.BottomNavigationView
        android:id="@+id/bottomNavigationView"
        android:layout_width="match_parent"
        android:layout_height="75dp"
        app:layout_constraintBottom_toBottomOf="parent"
        app:layout_constraintEnd_toEndOf="parent"
        app:layout_constraintHorizontal_bias="0.5"
        app:layout_constraintStart_toStartOf="parent"
        app:menu="@menu/bottom_nav_menu"/>

</androidx.constraintlayout.widget.ConstraintLayout>
*步骤 4:为底部导航栏创建菜单*
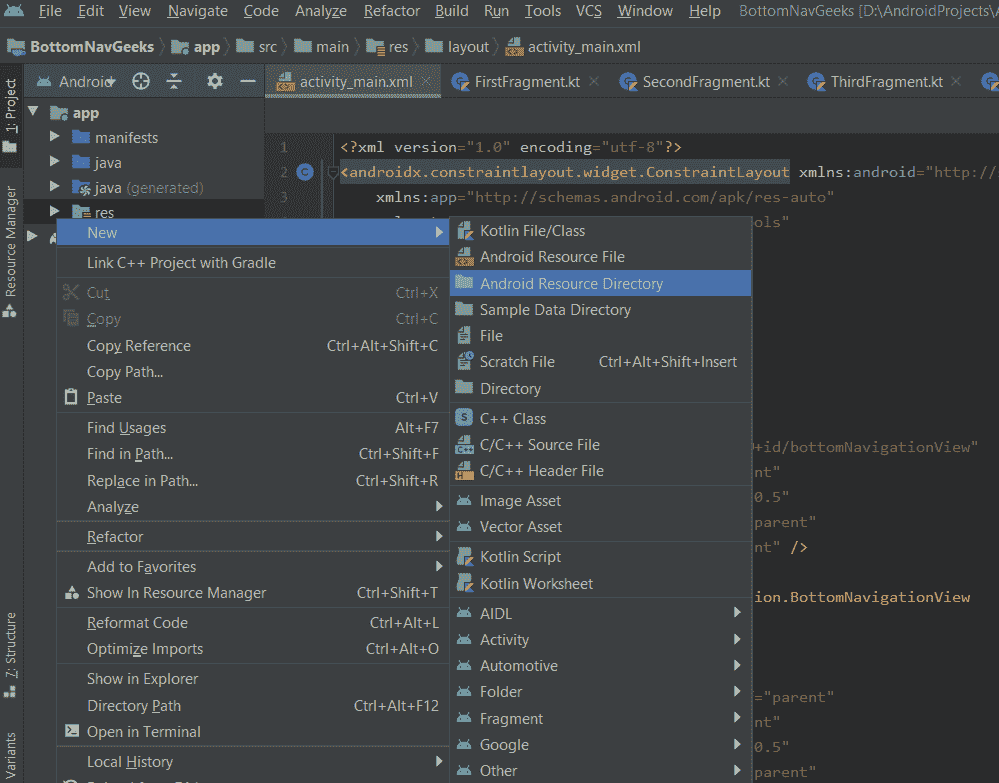
导航栏需要有一些使用 菜单 创建的项目。要创建菜单,首先通过点击 app - > res (右键)- > 新建 - > 安卓资源目录创建菜单,在资源类型 中选择菜单。
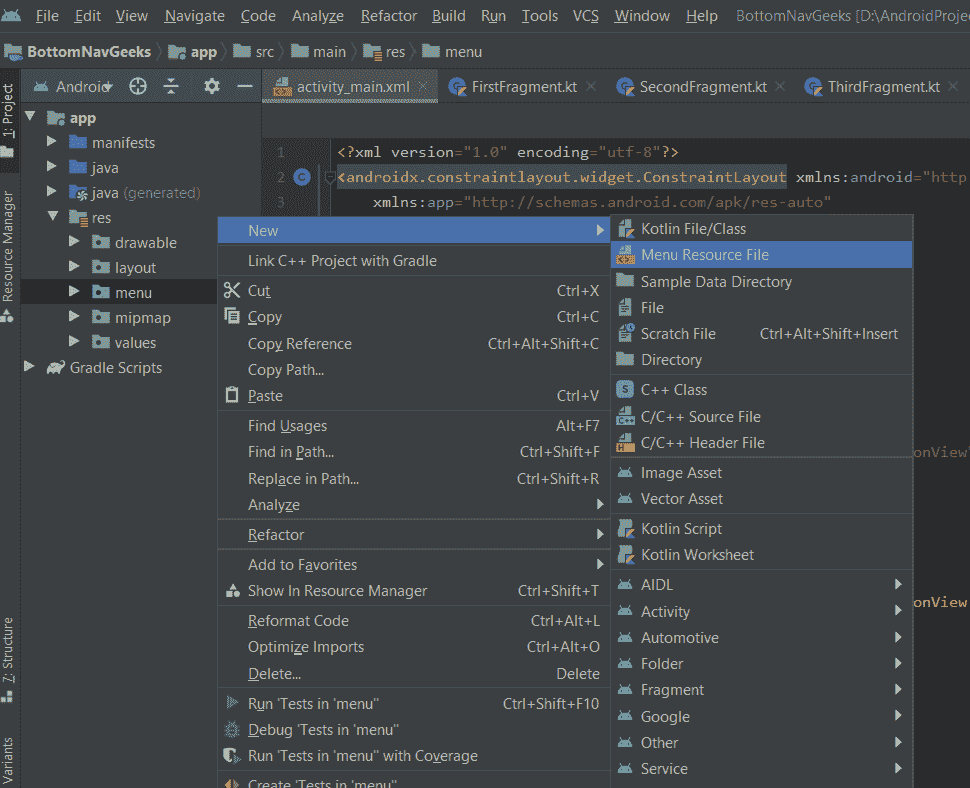
创建菜单资源文件,点击app->RES->菜单(右键)- > 新建 - > 菜单资源文件并命名为 bottom_nav_menu 。
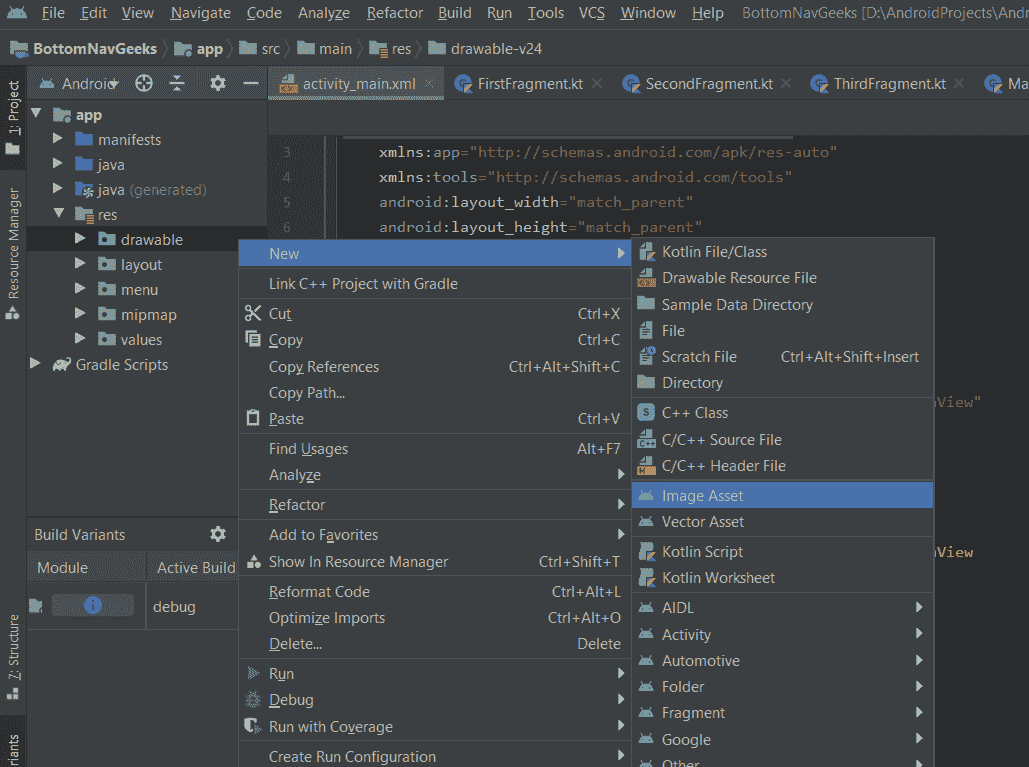
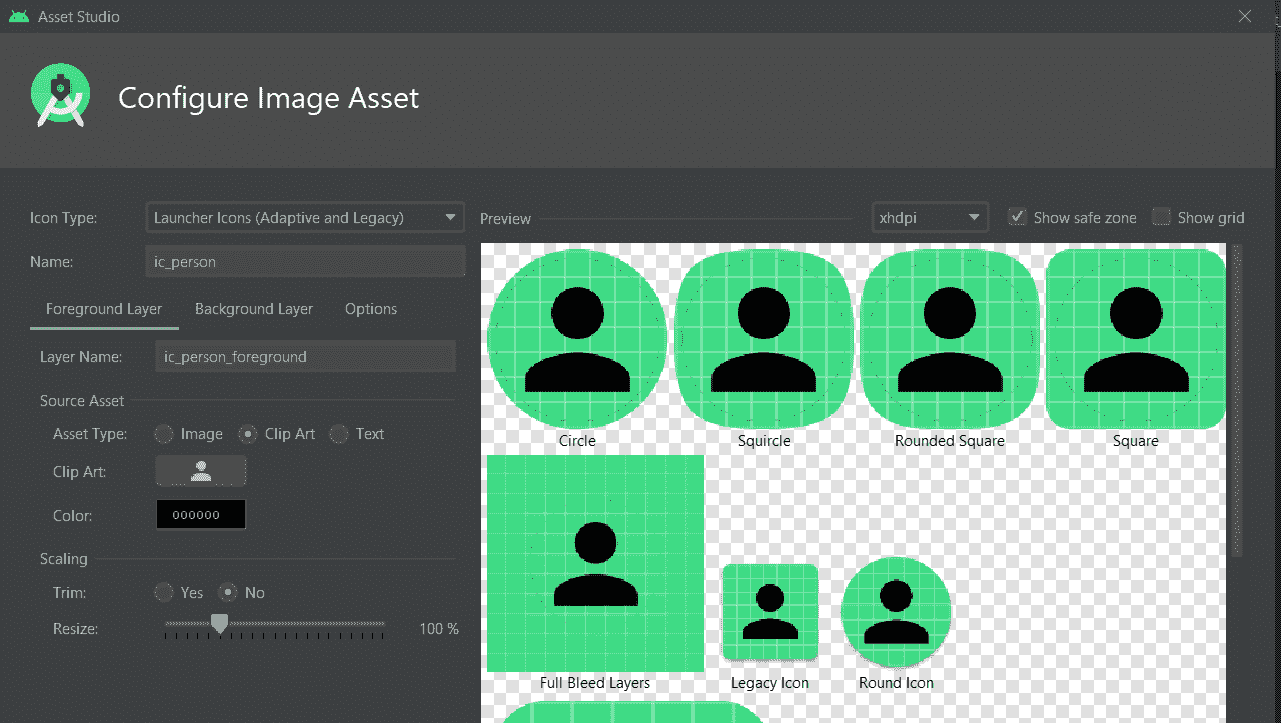
现在,用户可以在 bottom_nav_menu.xml 文件中创建任意多个项目。用户还需要为每个项目创建一个图标。要创建图标,请单击应用程序 - > 资源->(右键)- > 新建 - > 图像资源。****
* *
*
*在打开的窗口中,用户可以随意命名图标,但是*不应该包含任何大写字母 。用户可以通过搜索选择自己想要的图标,完成后点击下一步 - > 完成。****
* *
*
*现在将这些项目添加到*底部的 _nav_menu.xml 中。这是添加项目后的底部 _nav_menu.xml 文件的外观:****
*可扩展标记语言*
**<?xml version="1.0" encoding="utf-8"?>
<menu xmlns:android="http://schemas.android.com/apk/res/android">
    <item
        android:id="@+id/person"
        android:title="Person"
        android:icon="@drawable/ic_person_foreground"/>
    <item
        android:id="@+id/home"
        android:title="Home"
        android:icon="@drawable/ic_home_foreground"/>
    <item
        android:id="@+id/settings"
        android:title="Settings"
        android:icon="@drawable/ic_settings_foreground"/>
</menu>**
**第五步:改变动作栏样式****
*由于我们使用的是*谷歌的材质设计库,我们需要改变动作栏的样式来使用同一个库,否则底部导航栏将是黑色的,其项目将不可见。要更改它,通过单击应用程序 - > res - > 值->style . XML导航至style . XML,并将样式开始标记更改为:****
