安卓中的服务,示例
原文:https://www . geeksforgeeks . org/services-in-Android-with-example/
安卓中的服务是一个特殊的组件,它便于应用程序在后台运行,以便执行长时间运行的操作任务。服务的主要目标是确保应用程序在后台保持活动状态,以便用户可以同时操作多个应用程序。安卓服务不需要用户界面,因为它被设计为在没有任何用户干预的情况下运行长时间的流程。即使应用程序关闭或用户切换到另一个应用程序,服务也可以在后台连续运行。此外,应用程序组件可以将自身绑定到服务,以执行 进程间通信(IPC) 。安卓服务和线程之间有一个很大的区别,不要混淆两者。线程是操作系统提供的一项功能,允许用户在后台执行操作。而服务是一个安卓组件,它执行一个长时间运行的操作,用户可能不知道,因为它没有用户界面。
安卓服务的类型
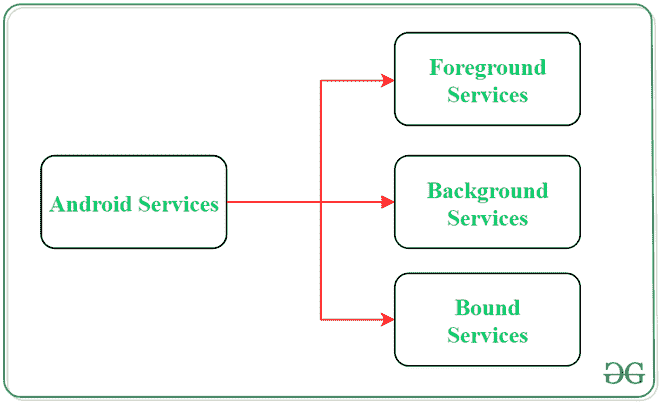
1。前台服务:
通知用户其正在进行的操作的服务称为前台服务。用户可以通过提供的关于正在进行的任务的通知与服务进行交互。例如在下载文件时,用户可以跟踪下载进度,也可以暂停和恢复该过程。
2。后台服务:
后台服务不需要任何用户干预。这些服务不会通知用户正在进行的后台任务,用户也无法访问它们。数据的计划同步或数据存储等过程都属于这项服务。
3。绑定服务:
这种类型的 android 服务允许应用程序的组件像活动一样与它绑定。只要有任何应用程序组件绑定到绑定服务,它就会执行任务。一次允许多个组件将自己与服务绑定。为了将应用程序组件与服务绑定使用了 bindService() 方法。
安卓服务的生命周期
在安卓系统中,服务有两种可能的路径来完成其生命周期,即 Started 和有界。
1.已启动服务(无限服务):
通过遵循此路径,当应用程序组件调用 startService() 方法时,服务将启动。一旦启动,即使负责启动服务的组件被破坏,服务也可以在后台持续运行。有两个选项可以停止服务的执行:
- 通过调用 stopService() 方法,
- 服务可以使用 stopSelf() 方法自行停止。
2.受限服务:
它可以被视为客户端-服务器界面中的服务器。通过遵循这个路径,android 应用程序组件可以向服务发送请求,并可以获取结果。当应用程序组件通过调用 bindService() 方法将自己与服务绑定时,服务被称为有界的。要停止此服务的执行,所有组件必须使用解除绑定服务()方法解除自身与服务的绑定。

要在后台执行下载任务,将调用 startService() 方法。然而,要获得关于下载进度的信息,并在应用程序仍处于后台时暂停或恢复该过程,服务必须与能够执行这些任务的组件绑定。
安卓服务基础
用户定义的服务可以通过扩展类服务的普通类来创建。此外,为了在应用程序上执行服务操作,有某些回调方法需要被覆盖。以下是安卓服务的一些重要方法:
安卓服务示例
在后台播放音乐是安卓中非常常见的服务例子。从用户启动服务开始,即使用户切换到另一个应用程序,音乐也会在后台持续播放。用户必须明确停止服务才能暂停音乐。下面是这个 android 服务使用一些回调方法的完整分步实现。
注:安卓 Studio 版本执行以下步骤
第一步:创建新项目
- 单击文件,然后单击新建= >新建项目。
- 选择空活动
- 选择语言为 Java/Kotlin
- 根据您的需要选择最小的软件开发工具包。
第二步:修改 strings.xml 文件
活动中使用的所有字符串都列在该文件中。
可扩展标记语言
<resources>
    <string name="app_name">Services_In_Android</string>
    <string name="heading">Services In Android</string>
    <string name="startButtonText">Start the Service</string>
    <string name="stopButtonText">Stop the Service</string>
</resources>
步骤 3:使用 activity_main.xml 文件
打开 activity_main.xml 文件,在其中添加 2 个按钮,启动和停止服务。以下是设计适当活动布局的代码。
可扩展标记语言
<?xml version="1.0" encoding="utf-8"?>
<androidx.constraintlayout.widget.ConstraintLayout
    xmlns:android="http://schemas.android.com/apk/res/android"
    xmlns:app="http://schemas.android.com/apk/res-auto"
    xmlns:tools="http://schemas.android.com/tools"
    android:layout_width="match_parent"
    android:layout_height="match_parent"
    android:background="#168BC34A"
    tools:context=".MainActivity">

    <LinearLayout
        android:id="@+id/linearLayout"
        android:layout_width="match_parent"
        android:layout_height="wrap_content"
        android:layout_centerVertical="true"
        android:orientation="vertical"
        app:layout_constraintBottom_toBottomOf="parent"
        app:layout_constraintEnd_toEndOf="parent"
        app:layout_constraintStart_toStartOf="parent"
        app:layout_constraintTop_toTopOf="parent"
        app:layout_constraintVertical_bias="1.0"
        tools:ignore="MissingConstraints">

        <TextView
            android:id="@+id/textView1"
            android:layout_width="match_parent"
            android:layout_height="wrap_content"
            android:layout_marginBottom="170dp"
            android:fontFamily="@font/roboto"
            android:text="@string/heading"
            android:textAlignment="center"
            android:textAppearance="@style/TextAppearance.AppCompat.Large"
            android:textColor="@android:color/holo_green_dark"
            android:textSize="36sp"
            android:textStyle="bold" />

        <Button
            android:id="@+id/startButton"
            android:layout_width="match_parent"
            android:layout_height="match_parent"
            android:layout_marginStart="20dp"
            android:layout_marginTop="10dp"
            android:layout_marginEnd="20dp"
            android:layout_marginBottom="20dp"
            android:background="#4CAF50"
            android:fontFamily="@font/roboto"
            android:text="@string/startButtonText"
            android:textAlignment="center"
            android:textAppearance="@style/TextAppearance.AppCompat.Display1"
            android:textColor="#FFFFFF"
            android:textStyle="bold" />

        <Button
            android:id="@+id/stopButton"
            android:layout_width="match_parent"
            android:layout_height="match_parent"
            android:layout_marginStart="20dp"
            android:layout_marginTop="10dp"
            android:layout_marginEnd="20dp"
            android:layout_marginBottom="20dp"
            android:background="#4CAF50"
            android:fontFamily="@font/roboto"
            android:text="@string/stopButtonText"
            android:textAlignment="center"
            android:textAppearance="@style/TextAppearance.AppCompat.Display1"
            android:textColor="#FFFFFF"
            android:textStyle="bold" />

        <ImageView
            android:id="@+id/imageView"
            android:layout_width="match_parent"
            android:layout_height="wrap_content"
            android:layout_marginTop="80dp"
            app:srcCompat="@drawable/banner" />
    </LinearLayout>

</androidx.constraintlayout.widget.ConstraintLayout>
第 4 步:创建定制服务类
将在主活动类所在的同一目录中创建一个自定义服务类,该类将扩展服务类。回调方法用于启动和销毁服务。要播放音乐,使用媒体播放器对象。下面是执行这项任务的代码。
Java 语言(一种计算机语言,尤用于创建网站)
import android.app.Service;
import android.content.Intent;
import android.media.MediaPlayer;
import android.os.IBinder;
import android.provider.Settings;
import androidx.annotation.Nullable;

public class NewService extends Service {

    // declaring object of MediaPlayer
    private MediaPlayer player;

    @Override

    // execution of service will start
    // on calling this method
    public int onStartCommand(Intent intent, int flags, int startId) {

        // creating a media player which
        // will play the audio of Default
        // ringtone in android device
        player = MediaPlayer.create( this, Settings.System.DEFAULT_RINGTONE_URI );

        // providing the boolean
        // value as true to play
        // the audio on loop
        player.setLooping( true );

        // starting the process
        player.start();

        // returns the status
        // of the program
        return START_STICKY;
    }

    @Override

    // execution of the service will
    // stop on calling this method
    public void onDestroy() {
        super.onDestroy();

        // stopping the process
        player.stop();
    }

    @Nullable
    @Override
    public IBinder onBind(Intent intent) {
        return null;
    }
}
我的锅
import android.app.Service
import android.content.Intent
import android.media.MediaPlayer
import android.os.IBinder
import android.provider.Settings

class NewService : Service() {

    // declaring object of MediaPlayer
    private lateinit var player:MediaPlayer

    // execution of service will start
    // on calling this method
    override fun onStartCommand(intent: Intent, flags: Int, startId: Int): Int {

        // creating a media player which
        // will play the audio of Default
        // ringtone in android device
        player = MediaPlayer.create(this, Settings.System.DEFAULT_RINGTONE_URI)

        // providing the boolean
        // value as true to play
        // the audio on loop
        player.setLooping(true)

        // starting the process
        player.start()

        // returns the status
        // of the program
        return START_STICKY
    }

    // execution of the service will
    // stop on calling this method
    override fun onDestroy() {
        super.onDestroy()

        // stopping the process
        player.stop()
    }

    override fun onBind(intent: Intent): IBinder? {
        return null
    }
}
步骤 5:使用主活动文件
现在,按钮对象将被声明,点击这些按钮时要执行的过程将在 MainActivity 类中定义。下面是实现这一步骤的代码。
Java 语言(一种计算机语言,尤用于创建网站)
import androidx.appcompat.app.AppCompatActivity;
import android.content.Intent;
import android.os.Bundle;
import android.view.View;
import android.widget.Button;

public class MainActivity extends AppCompatActivity implements View.OnClickListener {

    // declaring objects of Button class
    private Button start, stop;

    @Override
    protected void onCreate(Bundle savedInstanceState) {
        super.onCreate( savedInstanceState );
        setContentView( R.layout.activity_main );

        // assigning ID of startButton
        // to the object start
        start = (Button) findViewById( R.id.startButton );

        // assigning ID of stopButton
        // to the object stop
        stop = (Button) findViewById( R.id.stopButton );

        // declaring listeners for the
        // buttons to make them respond
        // correctly according to the process
        start.setOnClickListener( this );
        stop.setOnClickListener( this );
    }

    public void onClick(View view) {

        // process to be performed
        // if start button is clicked
        if(view == start){

            // starting the service
            startService(new Intent( this, NewService.class ) );
        }

        // process to be performed
        // if stop button is clicked
        else if (view == stop){

            // stopping the service
            stopService(new Intent( this, NewService.class ) );

        }
    }
}
我的锅
import android.content.Intent
import android.os.Bundle
import android.view.View
import android.widget.Button
import androidx.appcompat.app.AppCompatActivity

class MainActivity : AppCompatActivity(), View.OnClickListener {

    // declaring objects of Button class
    private var start: Button? = null
    private var stop: Button? = null

    override fun onCreate(savedInstanceState: Bundle?) {
        super.onCreate(savedInstanceState)
        setContentView(R.layout.activity_main)

        // assigning ID of startButton
        // to the object start
        start = findViewById<View>(R.id.startButton) as Button

        // assigning ID of stopButton
        // to the object stop
        stop = findViewById<View>(R.id.stopButton) as Button

        // declaring listeners for the
        // buttons to make them respond
        // correctly according to the process
        start!!.setOnClickListener(this)
        stop!!.setOnClickListener(this)
    }

    override fun onClick(view: View) {

        // process to be performed
        // if start button is clicked
        if (view === start) {

            // starting the service
            startService(Intent(this, NewService::class.java))
        }

        // process to be performed
        // if stop button is clicked
        else if (view === stop) {

            // stopping the service
            stopService(Intent(this, NewService::class.java))
        }
    }
}
第六步:修改 AndroidManifest.xml 文件
为了在任何安卓设备上成功实现服务,有必要在 AndroidManifest.xml 文件中提到创建的服务。如果服务没有在此文件中提及,它就不可能执行任务。服务名称在应用标签中提及。
可扩展标记语言
<?xml version="1.0" encoding="utf-8"?>
<manifest xmlns:android="http://schemas.android.com/apk/res/android"
    package="com.example.services_in_android">

    <application
        android:allowBackup="true"
        android:icon="@mipmap/ic_launcher"
        android:label="@string/app_name"
        android:roundIcon="@mipmap/ic_launcher_round"
        android:supportsRtl="true"
        android:theme="@style/AppTheme">
        <activity android:name=".MainActivity">
            <intent-filter>
                <action android:name="android.intent.action.MAIN" />
                <category android:name="android.intent.category.LAUNCHER" />
            </intent-filter>
        </activity>
        <meta-data
            android:name="preloaded_fonts"
            android:resource="@array/preloaded_fonts" />

        <!-- Mention the service name here -->
        <service android:name=".NewService"/>

    </application>

</manifest>
