如何使用 ColorStateList 改变安卓系统中按钮的背景颜色?
原文:https://www . geeksforgeeks . org/如何更改使用 colorstatelist 的安卓按钮的背景颜色/
colorstatist 是一个可以在 XML 文件中定义的对象,该对象可以根据其所应用的widgets的状态,在 Widgets(如 【按钮】 等)上应用不同的颜色。例如,按钮有许多状态,如(按下、聚焦或没有)和其他小部件状态,如启用、可检查、选中等。使用颜色状态列表是一种很好的方式来更改按钮的颜色,而不使用形状可绘制或自定义图像。人们应该记住颜色状态列表可以在任何使用颜色的地方使用。颜色状态列表是用 XML 定义的,保存在 res/color 文件夹下。颜色状态列表的根元素是选择器,使用颜色和 alpha 属性为您想要定义颜色的每个状态定义项目元素。默认颜色应该是未定义特定状态的颜色时使用的最后一个元素。 下面给出一个 GIF 样例,来了解一下在本文中我们要做什么。请注意,我们将使用柯特林语言来实现这个项目。

方法
第一步:创建新项目
要在安卓工作室创建新项目,请参考如何在安卓工作室创建/启动新项目。注意选择科特林作为编程语言。
步骤 2:使用 activity_main.xml 文件
转到布局文件夹,在活动 _main.xml 文件中,将 约束布局 更改为 线性布局,并将其方向垂直。将按钮和开关添加到布局中。下面是activity _ main . XML文件的代码。
可扩展标记语言
<?xml version="1.0" encoding="utf-8"?>

<!--Linear Layout with the vertical orientation and center gravity-->
<LinearLayout
    xmlns:android="http://schemas.android.com/apk/res/android"
    xmlns:tools="http://schemas.android.com/tools"
    android:layout_width="match_parent"
    android:layout_height="match_parent"
    android:gravity="center"
    android:orientation="vertical"
    tools:context=".MainActivity">

    <!--Button whose background color depends on the
        selector and state of the button-->
    <Button
        android:id="@+id/button"
        android:layout_width="160dp"
        android:layout_height="110dp"
        android:backgroundTint="@color/button_background_color"
        android:text="Click Me"
        android:textColor="@color/button_text_color"
        android:textSize="24sp"
        android:textStyle="bold" />

    <!--Switch with default state as enabled-->
    <Switch
        android:id="@+id/buttonSwitch"
        android:layout_width="160dp"
        android:layout_height="80dp"
        android:checked="true"
        android:text="Enabled"
        android:textAlignment="center"
        android:textSize="24sp"
        android:textStyle="bold" />

</LinearLayout>
第三步:添加一个以颜色命名的资源目录
向 res 文件夹添加一个名为 color 的资源目录,并保留根元素作为选择器,因为我们希望根据状态选择颜色。将两个名为按钮 _ 文本 _ 颜色. xml 和按钮 _ 背景 _ 颜色. xml 的资源文件添加到颜色资源目录中。出于与上面提到的相同的原因,保留选择器作为根元素。要执行上述操作,请参考下面的图像和代码。
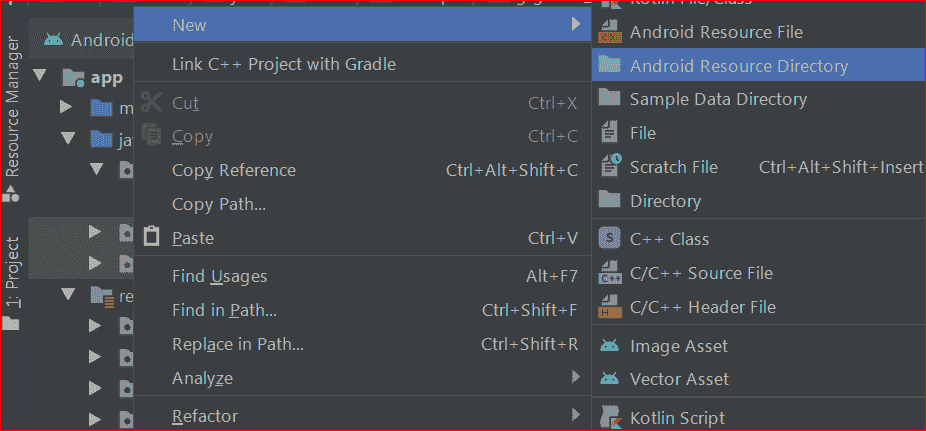
要创建颜色资源文件,请右键单击 res 文件夹,单击新建,然后选择安卓资源目录。
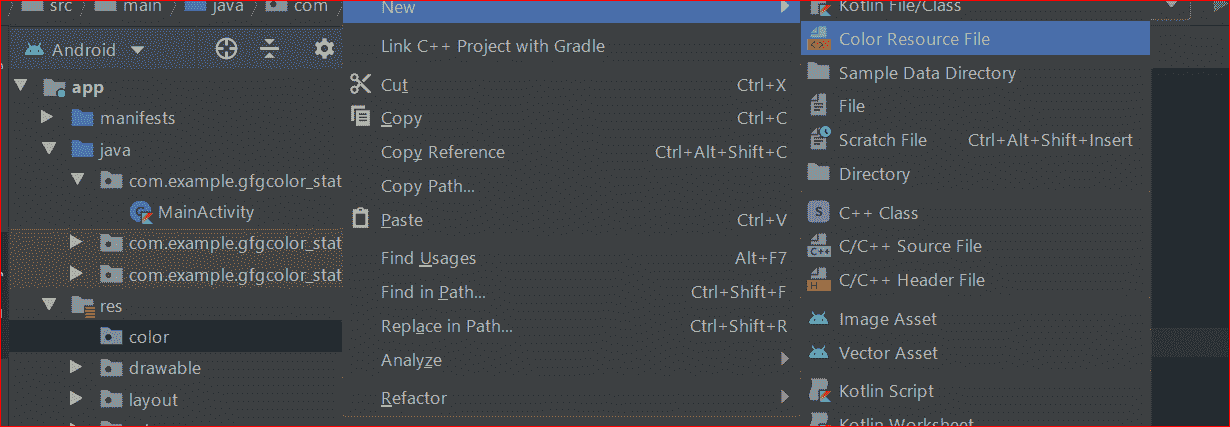
现在在颜色资源目录中创建资源文件( button_text_color.xml 和 button_background_color.xml ),方法是右键单击颜色目录并保持选择器为根元素。
下面是*按钮 _background_color.xml* 文件的代码。
可扩展标记语言
<?xml version="1.0" encoding="utf-8"?>
<selector xmlns:android="http://schemas.android.com/apk/res/android">

    <!--When Button is not enabled -->
    <item android:state_enabled="false" android:color="#b6b7b5" />
    <!--When Button is in pressed state -->
    <item android:state_pressed="true" android:color="#22a540" />
    <!--When Button is in selected state -->
    <item android:state_selected="true" android:color="#fabcff" />
    <!--Default Background Color -->
    <item android:color="@android:color/white" />

</selector>
下面是按钮 _text_color.xml 文件的代码。
可扩展标记语言
<?xml version="1.0" encoding="utf-8"?>
<selector xmlns:android="http://schemas.android.com/apk/res/android">

    <!--When the button is not enabled-->
    <item android:state_enabled="false" android:color="@android:color/white" />
    <!--When button is enabled-->
    <item android:state_selected="true" android:color="@android:color/white" />
    <!--Default Text Color-->
    <item android:color="#db402c" />

</selector>
*第 4 步:使用 MainActivity.kt 文件*
转到 MainActivity.kt 文件,参考至以下代码。下面是 MainActivity.kt 文件的代码。代码中添加了注释,以更详细地理解代码。
我的锅
import android.os.Bundle
import androidx.appcompat.app.AppCompatActivity
import kotlinx.android.synthetic.main.activity_main.*

class MainActivity : AppCompatActivity() {
    override fun onCreate(savedInstanceState: Bundle?) {
        super.onCreate(savedInstanceState)
        setContentView(R.layout.activity_main)

        button.setOnClickListener {
            // if button is already in selected state and now it is pressed
            // again,then it will reach in not selected state and vice versa
            button.isSelected != button.isSelected
        }

        buttonSwitch.setOnCheckedChangeListener { buttonView, isChecked ->
            // if the switch is checked,then enable the button,else not
            button.isEnabled = isChecked
        }
    }
}
*输出:在仿真器上运行*
